Deploy Blazor WebAssembly apps to Azure Static Web Apps
Azure Static Web Apps is a new service that allows you to easily deploy your Static web apps. As I’m working on a little Blazor Client App (with WebAssembly), It seems perfect to host it on Azure Static Web Apps. Here is a guide about how I’ve done it, and how you can do it for your own projects too!
What is Blazor? Blazor is a Web UI framework that allows you to create dynamic client apps by using C# instead of JavaScript. It’s using WebAssembly to execute C# code within the browser sandbox.
The plan
Deploying your Blazor App on Static Web App should take you less than 10 minutes! Here is the plan:
- Create your Blazor project and upload it to a GitHub repository (public or private),
- Create your Azure Static Web App,
- Customize the build,
- Customize URL Routing to forward navigation to Blazor Routing.
Let’s get started!
Create your Azure Static Web App
Let’s say I’ve pushed my application into a GitHub repo already, and the project is within src/frontend folder.
The first step to take is to create your Static Web App within the Azure portal :).
Static Web App (or SWA) has a free tier, so even if you don’t have an Azure Subscription, you can create a trial subscription and use it for free ;)
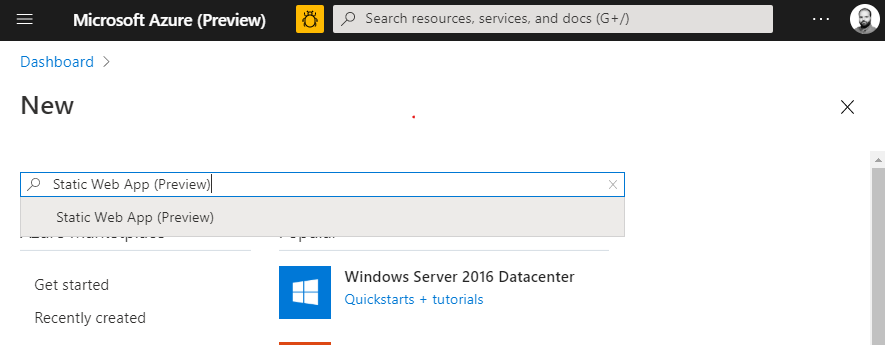
After clicking to Create new resource type Static Web Apps in the search box. Click on Create button.

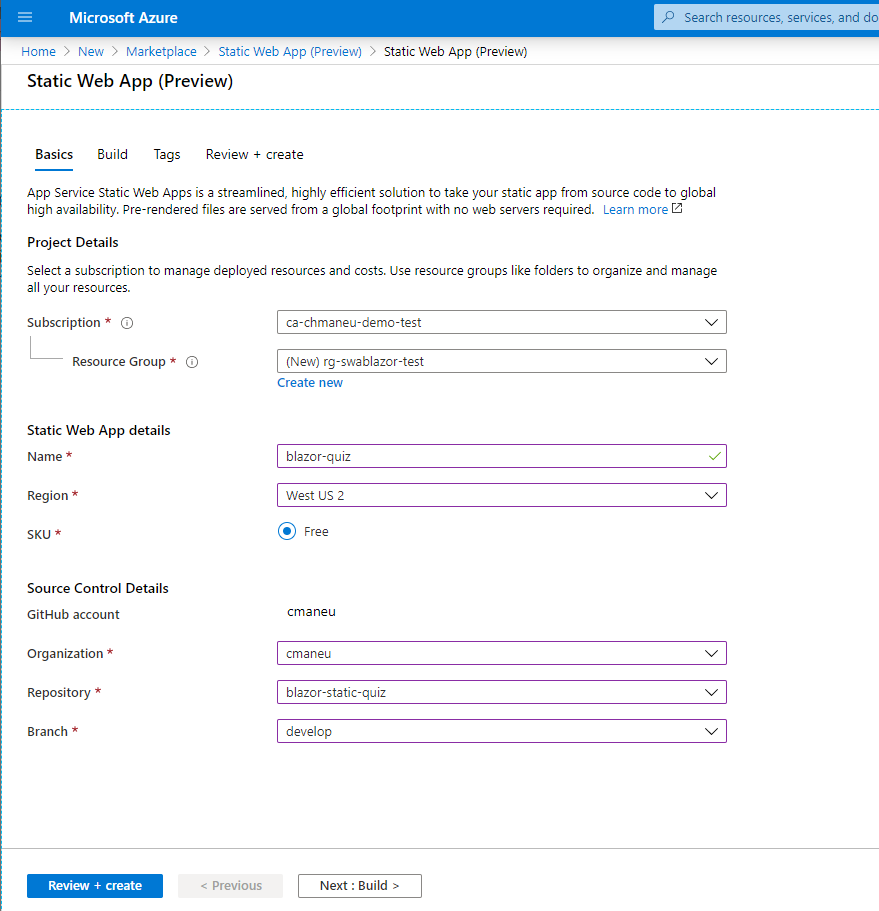
You’ll now have to enter few basic info, like the Subscription or the Resource Group (a container for your resources). The name of the static web apps is only for you. It’ll not be a part of the website address. The website address will be automatically generated, and you can later customize it with your own domain name.
The last step is to specify the GitHub source repository and branch. The first time you’re using SWA, you’ll need to authorize Azure to access your repositories. By doing so, it’ll automatically create a new GitHub Action to build and publish your website.

For now, Azure will create a commit on the specified branch with a new GitHub Action. If you already have other actions they should not be affected.
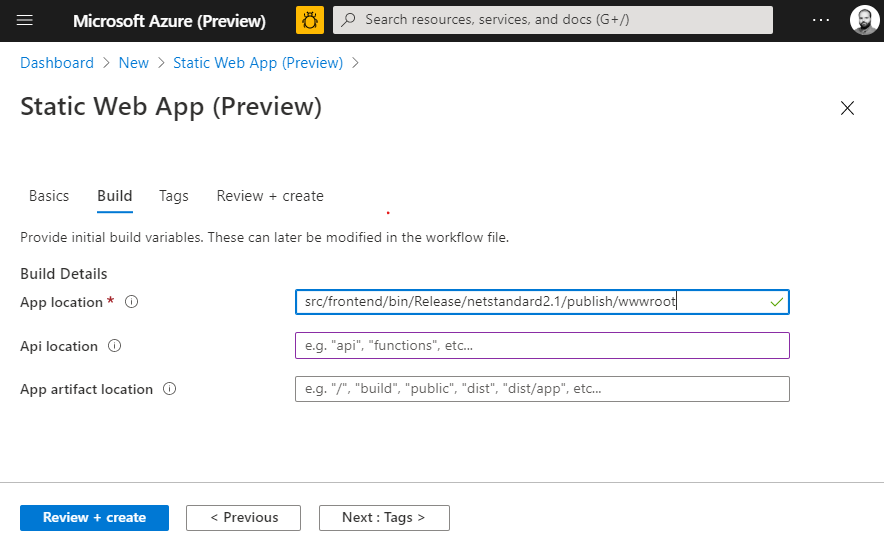
The second step is to instruct SWA about where your app is and how to build it. For now, SWA doesn’t support building
Blazor Apps, but there is a trick :): Build it beforehand in GitHub Actions and point SWA to the build output folder.
In my case, it’s
src/frontend/bin/Release/netstandard2.1/publish/wwwroot. I’ll leave the Api Location and App Artifact location
empty.

Click on Review+Create, confirm the creation and let’s jump onto the second step!
Update GitHub Actions
As I said before, we will have to build our Blazor project before deploying it to SWA. Go onto your Git/GitHub repo
(don’t forget to git pull if you’re working locally) and locate the GitHub Action .yaml file created by SWA.
It should start with azure-static-web-apps. Then add the following steps before the SWA - name: Build And Deploy
step. You may need to change the paths accordingly to your project structure.
| |
As you’ve probably spotted, I’m also capturing the build artifacts here. This step is not mandatory; however, I like to keep an archive of what’s been deployed. You can remove this step if you want.
Commit-Push this change to this repository and head over to the Actions tab on GitHub. Within minutes, your Blazor website should be deployed! Congrats 🎉
Fix URL Routing with Blazor
Almost all Blazor apps have several pages. So, what happens if a user is trying to reach for example yourapp.com/second-page? It will fail. That’s because this page - or directory - does not exists in your output and that’s normal. We need to tell SWA to serve our index.html for all non-matching routes, so Blazor routing can kick-in and resolve the appropriate Blazor Page.
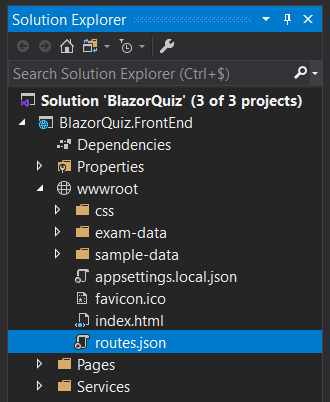
And it’s easy! You just need to create a routes.json file with the following content.
| |
The only remaining question is Where to create this page? It should be at the root of your published folder. For most of the projects, you can put it onto your wwwroot folder. Do not forget to set Build action to “Copy Always” ;).

You now have successfully deployed your Blazor App to Static Web Apps!
What about some Azure Functions?
For now, Static Web Apps only supports Azure Functions written in Node JS. If your functions are also written in NodeJs, you can simply specify the functions folder in the YAML file.
If your functions are written in C#, for now, you can create another action to publish them directly to Azure Functions.
Citation
For attribution, please cite this work as
Maneu (2020, May 19). maneu.net: Deploy Blazor WebAssembly apps to Azure Static Web Apps. Retrieved from https://www.maneu.net/dev/2020-05-deploy-blazor-client-apps-with-azure-static-apps/
@misc{ ,
 author = {Maneu, Christopher},
 title = { Deploy Blazor WebAssembly apps to Azure Static Web Apps },
 url = { https://www.maneu.net/dev/2020-05-deploy-blazor-client-apps-with-azure-static-apps/ },
 year = { 2020 }
}